Table of Contents
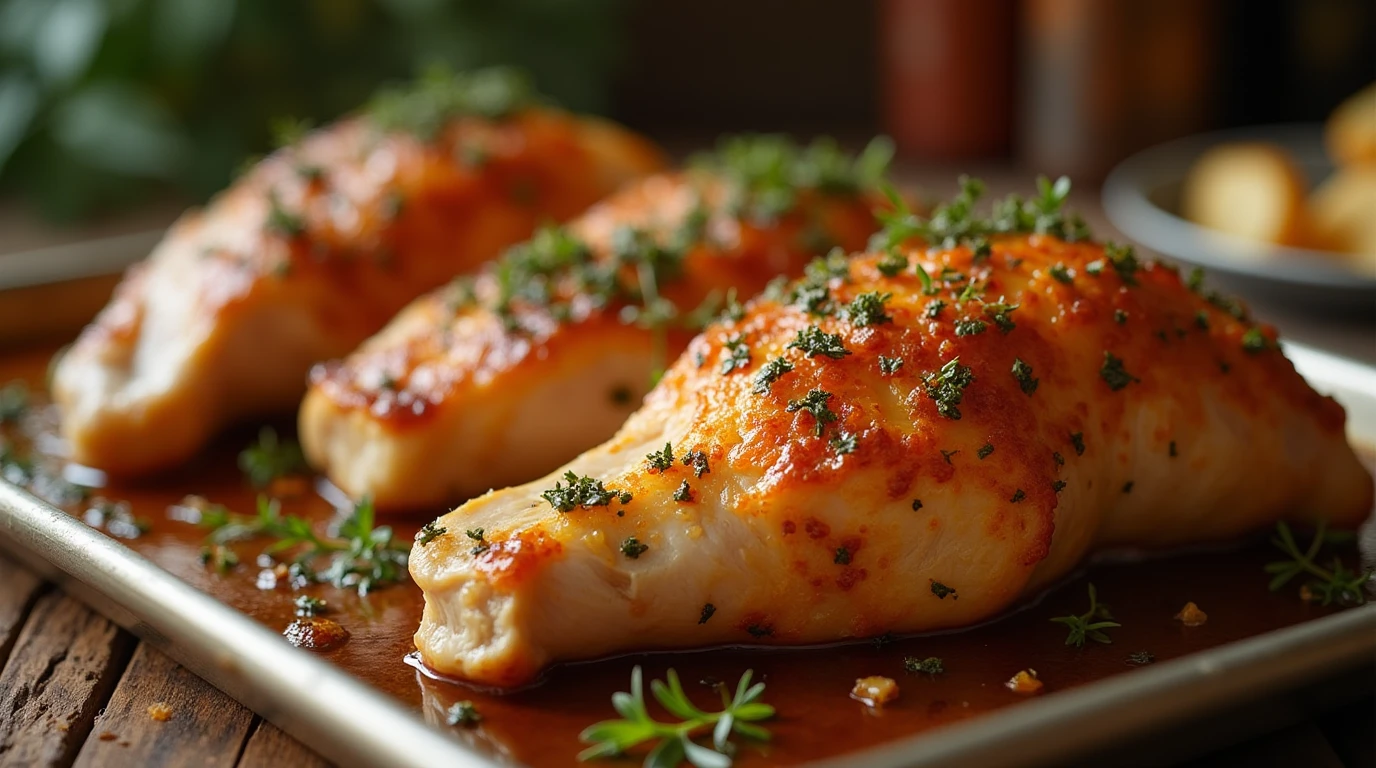
Struggling with chicken breasts that turn out dry, tough, and flavorless no matter what you try? You’re not alone. Split chicken breasts are notoriously difficult to cook properly, with that thick end often ending up overcooked while you’re waiting for the thinner parts to finish cooking. But don’t worry—this foolproof baked split chicken breast recipe delivers juicy, tender meat with perfectly crispy skin every single time. After testing dozens of chicken recipes in professional and home kitchens for over a decade, I’ve perfected the technique that balances temperature, timing, and seasoning for restaurant-quality results. In this comprehensive guide, I’ll share everything from selecting the perfect split chicken breasts to my signature seasoning blend, plus pro tips for achieving that golden-brown skin that will make your dinner guests think you attended culinary school.
Why This Baked Split Chicken Breast Recipe Works
- Uses bone-in, skin-on split chicken breasts for maximum flavor and moisture
- Requires simple preparation with no complicated techniques
- Features a foolproof temperature and timing method that prevents overcooking
- Creates perfectly crispy skin without extra fat or complicated steps
- Costs significantly less than boneless breasts while delivering superior taste
- Works equally well for casual family dinners or impressive entertaining
- Provides versatile leftovers for salads, sandwiches, and meal prep
Choosing the Right Meat
Best Cuts for This Recipe
For this recipe, you’ll need bone-in, skin-on chicken breasts, also known as “split chicken breasts.” This cut includes half of the chicken’s breast with the ribs and skin attached. The bones act as insulators, helping the meat cook more evenly and stay juicy. The skin creates a protective layer that crisps up beautifully while sealing in moisture. If you’ve been using boneless, skinless breasts, you’ll be amazed at the flavor difference this simple switch makes.
Buying Tips
Look for split chicken breasts with plump, firm flesh and skin that’s intact (not torn). The skin should appear creamy white to pale yellow, never gray or discolored. Size matters—try to select breasts that are similar in size for even cooking. Organic or free-range chicken often has better flavor and texture, but conventional split breasts will still deliver excellent results with this method. Ask your butcher to trim excess fat or rib sections if needed.
Substitutions
If split chicken breasts aren’t available, you can use whole bone-in chicken breasts (which include both sides of the breast) and increase cooking time accordingly. For smaller portions, bone-in chicken thighs work well with this method (reduce cooking time by about 10 minutes). Avoid substituting boneless chicken breasts as they require completely different cooking times and techniques.
Ingredients & Prep
Meat Prep Essentials
Start by patting the split chicken breasts completely dry with paper towels—this is crucial for achieving crispy skin. Trim any excess fat or loose pieces of skin if needed. For maximum flavor penetration, gently loosen the skin from the meat without detaching it completely, creating a pocket for seasonings. Allow the chicken to come to room temperature for 20-30 minutes before cooking for more even results.
Marinades/Rubs
Basic Herb Rub (per 2 split breasts):
- 1 tablespoon olive oil
- 2 teaspoons kosher salt
- 1 teaspoon freshly ground black pepper
- 1 teaspoon garlic powder
- 1 teaspoon dried thyme
- 1 teaspoon paprika
- ½ teaspoon onion powder
Mix all ingredients in a small bowl. Apply half of the mixture under the loosened skin, directly onto the meat, and the remainder on the skin and all sides of the chicken. For best results, let the seasoned chicken rest in the refrigerator for 2-24 hours for deep flavor penetration.
Pantry Staples
Keep these essentials on hand for perfect baked split chicken breasts: high-quality olive oil, kosher salt (not table salt), black peppercorns in a grinder for freshness, and dried herbs (thyme, rosemary, and oregano work particularly well with chicken). For enhanced flavor, consider adding lemon zest, fresh garlic, or a splash of white wine to your preparation.
Step-by-Step Cooking Instructions
Pre-Cooking Prep
- Remove chicken from the refrigerator 20-30 minutes before cooking
- Preheat your oven to 400°F (204°C)
- Line a baking sheet with aluminum foil and place a wire rack on top (this elevates the chicken for even cooking and crispy skin all around)
- Pat chicken completely dry with paper towels
- Apply your chosen seasonings both under the skin and on all exterior surfaces
Cooking Method
- Place the seasoned split chicken breasts skin-side up on the prepared rack
- Position the thicker parts toward the outside of the pan (where heat is typically higher)
- Bake at 400°F (204°C) for 35-45 minutes depending on size
- For extra-crispy skin, switch to broil for the final 2-3 minutes, watching carefully to prevent burning
- If using a sauce or glaze, apply it during the last 10 minutes of cooking
Doneness Check
The most reliable way to check doneness is with an instant-read thermometer inserted into the thickest part of the breast without touching bone. Chicken is safely cooked at 165°F (74°C), but I recommend removing it from the oven when it reaches 160°F (71°C), as carryover cooking will bring it to the safe temperature while resting. The juices should run clear, not pink, when pierced.
Resting
Allow the baked split chicken breasts to rest for 5-10 minutes before slicing or serving. This crucial step allows the juices to redistribute throughout the meat, ensuring maximum tenderness and flavor. Cover loosely with foil during resting if you’re concerned about the chicken getting cold, but be aware this may soften the crispy skin slightly.
Pro Tips for Perfect Baked Split Chicken Breast
Avoiding Tough/Dry Meat
- Never skip the resting period after cooking
- Cook to temperature, not time—invest in a good instant-read thermometer
- Consider brining the chicken before cooking: dissolve ¼ cup each of salt and sugar in 4 cups of water, submerge chicken for 1-2 hours, then rinse and pat dry
- Position the chicken skin-side up and don’t flip during cooking
- For extremely large breasts, butterfly the thickest part to ensure even cooking
Tool Recommendations
An instant-read digital thermometer is absolutely essential for perfect results. A rimmed baking sheet paired with an oven-safe wire rack promotes air circulation for crispy skin all around. A pair of kitchen shears makes trimming excess fat and skin much easier. For carving, use a sharp chef’s knife or a dedicated carving knife to create clean slices without tearing the meat.
Storage & Reheating
Store leftover baked split chicken breast in an airtight container in the refrigerator for up to 4 days. For best results when reheating, remove meat from the bone and slice before storing. Reheat gently in a 300°F (149°C) oven covered with foil and a splash of chicken broth to restore moisture. Alternatively, enjoy leftover chicken cold in salads or sandwiches to avoid the texture changes that can occur with reheating.
Flavor Variations
Spicy Southwest
Replace the herb rub with a blend of 1 tablespoon chili powder, 1 teaspoon each of cumin and oregano, ½ teaspoon cayenne pepper, and 1 teaspoon brown sugar. Serve with lime wedges and cilantro for a Southwestern twist.
Keto/Paleo Version
Create a keto and paleo-friendly version by using ghee instead of olive oil in your rub. Add 1 tablespoon of nutritional yeast to the seasoning mix for a deeper umami flavor without added carbs. Pair with avocado and roasted vegetables for a complete low-carb meal.
Global Flavors
- Mediterranean: Use a blend of dried oregano, lemon zest, garlic, and olive oil under the skin
- Asian-Inspired: Combine ginger, garlic, five-spice powder, and a touch of honey for a sweet-savory glaze
- Italian Herb: Create a paste of fresh basil, parsley, garlic, and olive oil to place under the skin before baking
Serving Suggestions
Baked split chicken breast pairs beautifully with both starchy and vegetable sides. For classic comfort food, serve alongside creamy mashed potatoes and roasted carrots. For a lighter option, try a crisp green salad with vinaigrette and steamed asparagus.
The natural flavors complement both bold and subtle wine choices—try a buttery Chardonnay, crisp Pinot Grigio, or light-bodied Pinot Noir. For beer enthusiasts, a Belgian witbier or German hefeweizen offers refreshing contrast to the savory chicken.
For a complete meal with minimal effort, toss root vegetables like potatoes, carrots, and onions in olive oil and roast them on a separate rack beneath the chicken—they’ll absorb the flavorful drippings and be ready at the same time.
FAQs
Can I use frozen split chicken breasts?
For best results, completely thaw frozen chicken in the refrigerator before cooking (typically 24-48 hours). Cooking from frozen will result in uneven cooking and potentially unsafe food handling. If you’re short on time, thaw in cold water, changing the water every 30 minutes.
My chicken skin didn’t get crispy. What went wrong?
There are several possible causes: the chicken wasn’t patted dry completely, the oven temperature was too low, or the chicken was overcrowded on the baking sheet. Ensure your chicken is thoroughly dried, your oven is properly preheated, and each breast has adequate space for air circulation.
Is this recipe safe for pregnant women?
Yes, this recipe is perfectly safe for pregnant women as long as the chicken reaches the proper internal temperature of 165°F (74°C). Using a reliable meat thermometer is especially important for peace of mind when cooking for vulnerable populations.
Can I make this recipe without a wire rack?
While a wire rack produces the crispiest results, you can place the chicken directly on a lined baking sheet. For similar results without a rack, place the chicken on a bed of thick-cut onions, celery, and carrots, which will elevate it while adding flavor to the drippings for an amazing sauce.
Conclusion
Now that you’ve discovered the secrets to perfectly baked split chicken breasts, it’s time to put this knowledge into action! Heat up your oven and transform this humble cut into a centerpiece-worthy dish that proves chicken breasts don’t have to be boring or dry. Join the thousands of home cooks who’ve mastered this technique and rediscovered their love for simple, delicious chicken. Looking for more poultry perfection? Check out our related recipes for Herb-Roasted Whole Chicken, One-Pan Chicken Thigh Dinner, or Sunday Roast Chicken with Vegetables for more foolproof methods that will elevate your cooking game!